Cabinet Painting Sacramento offers homeowners an affordable, transformative kitchen upgrade. While it can be tempting to cut corners, the best approach is to take time to properly prep and apply specialized paint for a durable finish.
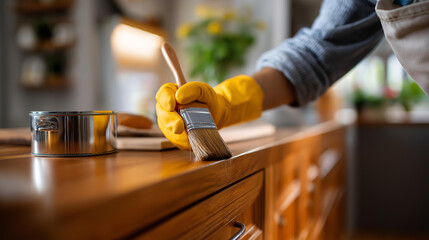
Before getting started, protect countertops and other surfaces you don’t want to get paint on with painters tape and drop cloths. Carefully labeling each cabinet door and drawer helps to ensure a smooth reassembly.
Catalyzed Finishes
When you’re shopping for the perfect wood finish to protect your cabinet doors, there are a variety of options. But when it comes to durability, the premium choice is often a post-catalyzed conversion varnish. This finish is used by professional furniture finishers and offers a range of benefits over other types of finishes.
In addition to providing a superior sheen, these finishes offer a long-lasting defense against moisture, grease, and daily cleaning. They also resist fading, scratches, and other damage better than paint and lacquer. EMTECH’s EM6500 Pigmented Varnish series is one such example of a high-quality, post-catalyzed clear coat that will last for decades on your kitchen cabinetry. This finishing system is formulated to meet and even exceed the performance of traditional solvent-based lacquers, and it can be fortified with CL100 Crosslinker (3-5% by volume) to increase chemical resistance and durability.
A catalyzed finish can be applied by either a brush or spraying method, although getting a precise and even finish when applying a catalyzed finish requires more skill than using a traditional paint. It’s also more likely to require the use of a good exhaust system, and you may need to wear an organic-vapor respirator mask. The primary advantages of a catalyzed finish include its durability (similar to that of oil-based polyurethane) and its fast drying, which significantly reduces dust nibs on horizontal surfaces and prevents runs or sags on vertical ones.
Depending on the brand of finish you choose, it may be called pre-catalyzed or post-catalyzed, and it can be thinned with toluene, xylene, or a proprietary manufacturer’s thinner. The most popular choice is pre-cat, which contains acid catalyst and nitrocellulose, but it’s less durable than post-cat and requires more frequent touch-ups.
While it’s easy to confuse conversion varnish with polyurethane, the latter is actually a type of varnish that is much more durable than lacquer. It can be a bit tricky to apply because it’s typically thicker than other finishes, but with the right application methods, you can achieve an attractive and protective finish that will last for years.
Low-VOC or Zero-VOC Paints
While VOCs are a necessary part of many paint formulations, there are low and zero-VOC options available that eliminate the risk for health issues while delivering quality finishes. In some cases, these products may cost a little more, but the peace of mind they provide for your family and the environment will likely far outweigh the extra expense.
Low-VOC and zero-VOC paints use a combination of natural ingredients and water to deliver a finish that is both durable and long-lasting. When applied properly, these products can look and perform much like standard paints. Additionally, they typically dry faster than traditional paints and do not have that overwhelming odor that can linger for days after painting is completed.
When considering low-VOC or zero-VOC paints, it is important to read labels carefully. While these paints have a lower VOC content than traditional paints, they can still contain toxic chemicals such as formaldehyde and biocides. These paints are also not nontoxic, so it is still best to ventilate the room well while painting and to avoid prolonged exposure during this time.
Traditional paints can release VOCs into the air for months and years after application, leading to poor indoor air quality in your home. This is especially true in poorly-ventilated spaces where chemicals can build up over time. Low-VOC and zero-VOC options have significantly reduced VOC emissions, providing a safer option for your health.
Choosing these paints will also benefit the environment, as they contribute less to photochemical smog, which can cause damage to human health and the planet. These paints are also kinder to the ozone layer, making them an excellent choice for any environmentally conscious household.
While lowering your VOC emissions is a good choice for the environment and your health, it is always advisable to wear a face mask during any paint job, regardless of whether you are using a high or low-VOC product. In addition, it is recommended that you use a respirator when handling volatile solvents such as xylene, toluene and methylene chloride, which can all pose health risks when inhaled over extended periods of time.
Closed Grain Woods
Wood grain refers to the pattern that cellulose fibers form and typically appears on cross sections of sawn wood. It also has a bearing on the stability, strength and hardness of the wood. Grain is largely determined by how the wood is grown and cut. For example, when wood is cut parallel to the growth rings it is considered end grain; perpendicular and tangent to the rings yields plain or tangential grain; cutting it on the radius of the rings results in quarter grain. Hardwoods have special longitudinal cells called vessel elements. These cells reveal pores when cut, affecting the appearance of sawn wood. Softwoods have a different structure with thin-walled conductor cells that do not reveal pores.
When it comes to painting, the type of wood that you choose can have a significant impact on your results. Open-grained woods have large pores that can show through a finish, making them more difficult to work with and often more prone to cracking and splitting than closed-grain types. This may not be a problem in and of itself, but it can have an impact on the final look and performance of your finished kitchen cabinets.
To ensure a flawless finish, it is essential to choose the right primer. Shellac-based products are a good option for this purpose as they provide an effective sealer, block water-based bleed and help to prevent surface stress. It’s important to apply these primer coats in small, controlled increments and follow the recommended dry times for optimal adhesion.
Closed-grain woods like maple, cherry and oak generally take paint well, especially with a light stain. Oak can be a bit more challenging to work with because it has an open, porous grain that requires a lot of sanding and filling to get a smooth surface for painting.
Hickory is another example of a closed-grain wood that works well with paint or stain. It is very durable and resists dents better than other softer woods, but its bold grain pattern can be overwhelming for some spaces. This is where a stain can really come in handy to soften the contrast and add a little extra flair.
Proper Preparation
Cabinet painting is a more detailed process than standard house paint jobs, with many steps required for a flawless finish that can last years. Professional cabinet painters know how to prepare surfaces for paint, degrease and clean well, sand thoroughly, prime and apply multiple coats of specialized kitchen cabinet paint, creating a durable finish that is resistant to daily wear and tear, grease and humidity. They also use a variety of spray and brush application methods, tailored to the unique demands of cabinets.
Whether you want to add contrast for a dramatic look or create a soothing neutral backdrop, painting your cabinets is one of the easiest and most affordable ways to breathe new life into your kitchen or bathroom. Cabinets aren’t just storage – they’re the foundation of your style, and the right color and finish can make or break the room.
Before you can get started with any of these techniques, you’ll need to prep the cabinets. You’ll need to remove all doors and hardware, and then sand down the current finishes to roughen them up a bit, making sure that the primer will adhere properly. Depending on the quality of your existing finish, you may need to sand down to bare wood, or you may be able to just sand enough to smooth out any high spots and even out the texture.
Once your surfaces are sanded and ready for primer, you’ll need to decide if you’re going to do a light coat of primer before moving on to the actual color. Then, you’ll need to let the primer dry completely before moving on to your final coats of color. It’s important to follow the recommended drying times, and you should always wait for the paint to cure before reinstalling your doors or hardware.
When it comes to kitchen cabinet painting, hiring a professional is always the best way to go. They will take care of everything, from removing and labeling the hardware to masking off your countertops and floors and ensuring proper ventilation during the entire project. Professional cabinet painters are trained to handle the intricacies of this delicate work, and they use a variety of specialized tools and techniques designed for these highly visible, frequently used surfaces.